
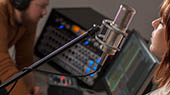


Like any tool, a microphone must be used properly to get the best result. Professional broadcasters or vocalists will tell you that good microphone technique is crucial to getting a good recording. How many times have you listened to a podcast where it sounded like there was a wall between the on-air talent and their microphone? Or the microphone was so close you could hear each breathe and every popping ‘P’ sounded like a mini explosion in your headphones?
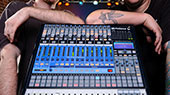
Proximity to the microphone is the most common issue when anyone begins the process of learning proper mic technique, but other issues, like background noise and improper gain staging, will exacerbate a poorly positioned microphone. Don't worry, we’ve all been there, and PreSonus has put together this tutorial to help you mitigate the most common mistakes people make when getting started recording their voice with a microphone.
Handling Noise
Microphones are designed with different polar patterns. A polar pattern is the space around the microphone’s capsule where it is most sensitive to sound. The most common pattern for vocal and broadcast microphones is Cardioid:

When looking at the shape of this polar pattern, it quickly becomes apparent why holding a microphone too close to the capsule is problematic. While this is fine for a stage performance where the sheer volume of the instruments on stage will mask this noise, in an audio recording made from a quiet location, this noise becomes a distraction from the primary sound source, in this case, your podcast.
 The easy solution is to invest in a desktop stand. Every microphone on the market arrives at your podcasting studio with a mount to attach it to a microphone stand, so use it!
Many broadcasting and desktop mic stands are available from fixed position microphone stands to adjustable stands that allow you some freedom of movement and they are well worth the investment. Even if you are using a stage dynamic microphone, it is still advisable to attach to a stand and sit still.
How Close is Too Close
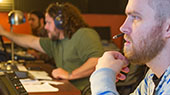
 Microphones are designed to pick up sound; that’s their job. When people are first getting started using a microphone, there is a natural tendency to speak too softly or too loudly. Just be you. Speak in your normal voice and adjust your seating position so that your mouth isn’t so close that people can hear its movements, but close enough that it sounds natural and reproduces well. This is where monitoring your podcast through headphones is especially helpful. As a general rule, if it sounds good in your headphones, it will sound good in your recording.
A good starting point is to position your mouth about four inches from the microphone. If you project your voice naturally, you may need to sit a little further back. The good news is that good microphone technique quickly becomes muscle memory once you get the hang of it, so the more you practice, the less awkward it becomes.
Problematic Pronunciation
 Depending on the type of microphone you have purchased and your natural speaking style, additional adjustments may be necessary:
- Plosives. Plosives are the bursts of air that is picked up by the microphone. They can occur with any consonant but are most common when you say ‘P’ or ‘B’ sounds. The audio industry has battled these natural speech events for so long that there is a specialized tool to combat them: The Pop Filter. The pop filter sits between your mouth and microphone and slows down the bursts of air, shielding the microphone from picking up these unwanted sounds. The other advantage of a pop filter is that it can be used for maintaining a fixed position in front of your microphone and is especially useful when recording your podcast with a condenser microphone.
- Sibilance. Sibilance occurs when you make a consonant sound by directing your breath to the back of your teeth using your tongue. The most common examples of problematic sibilants are ‘S’ and ‘Z’ sounds. Depending on your speech pattern, you may naturally exaggerate these sounds without noticing and this may be a habit that you wish to alter while you’re recording. Luckily, if this is a habit you cannot or do not want to break, you can fix most sibilance issues in post-production as long as you are multi-tracking your podcast using a dynamics effect called a de-esser. Professional DAW applications, like PreSonus Studio One, are equipped with a de-esser plug-in especially for this purpose.
A note on fixing it in the mix: If you are recording a stereo mix of several microphones, using a de-esser can cause more problems than it solves because over-using a de-esser or putting one where it is not needed can turn all your ‘S’ sounds to “Th” sounds, and you can easily give someone a lisp they don’t have.
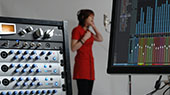
Putting It All Together
Once you've practiced your microphone placement and technique, do some practice recordings to find out what works for you and what doesn't. Just sit in front of the microphone and talk as you would if you were chatting with a friend. The more natural you feel behind the microphone, the more engaging your podcast will be. Letting your natural charisma and charm come across is the best way to engage your audience.