


Adding a subwoofer to your sound system allows it to run more efficiently because the low-frequency content is reproduced by the subwoofer instead of the full-range system. However, if a subwoofer is not configured properly, the overall sound becomes muddy and ill-defined. PreSonus has put together this article to cover some simple and effective configuration and mix tips to help you get the most low-end punch and efficient sound reproduction.
Aux-fed Subwoofer Setup
Most subwoofers, including those made by PreSonus, provide throughputs to connect satellite full-range systems. This simple set-up is ideal for mobile DJ applications because the music is largely already optimized for a three-way sound system. But when adding a larger mix and more than a couple of live microphones, it becomes increasingly important to create a dedicated mix just for your subwoofer. The reason for this is simple: not every instrument on stage operates within the sub-bass frequency range that is reproduced by your subwoofers. This means that any signal that is reproduced by a subwoofer is just unwanted noise.
Let’s take the example of a vocal microphone. The typical human vocal range is between 100 Hz to 3 kHz for the fundamental with harmonics extending as high as 17 kHz. Obviously, this range narrows for male and female vocalists; however, this range sits squarely within the frequency response of a well-designed two-way loudspeaker. In other words, you don’t need a subwoofer to reproduce any noise that a human vocal is going to produce.
 The PreSonus ULT18, for example, reproduces frequencies from 42 Hz to 150 Hz. Even at its uppermost range, it will still only reproduce the very lowest vocal frequencies. These same frequencies are easily reproduced by a two-way loudspeaker. The 12-inch PreSonus ULT12, for example, has a range that extends from 55 Hz to 18 kHz.
But a live microphone will pick up more than just its intended signal. Handling noise, the plosive sounds, and bleed from lower frequency instruments like kick drums and bass amps will all find their way to the subwoofer if a vocal mic is in the subwoofer mix. The problem is that these unwanted noises distort the clarity of the sub-bass range and muddy the mix, reducing clarity and intelligibility.
 The solution is to run your subwoofers on an output separate from your main front-of-house full-range loudspeakers to afford the most efficient sub-bass and low-frequency reproduction. A post-fader aux mix output is ideally suited for this as it provides independent level control over the subwoofer system and greater flexibility over the bass content in your mix, while still following the main mix mutes.
Creating an aux mix for your subwoofer system is just like creating an aux mix for a floor monitor only instead of creating a mix for a musician, you will be creating a mix using instruments that provide sub-energy content. Another advantage of using an aux mix is that if, for example, you want the kick drum to punch louder in the subwoofer, you can raise its level in the subwoofer only.
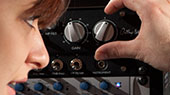
StudioLive Series III digital mixers make creating an Aux-fed Sub mix easy by providing up to 32 FlexMixes. FlexMixes can be configured as aux mixes, subgroups, or matrix mixes. From the settings screen for your Sub mix, simply enable Post so that the send levels to the Sub mix will follow the Main fader movements.
The StudioLive 64S takes this a step further by providing a dedicated Main Mono bus with individual channel sends. Not only does this allow you to create your own Aux-fed Sub mix, because the Mono and Main Stereo output faders are grouped, raising or lowering the Master fader controls your entire front-of-house system.
Stereo Mains, Mono Subs
 Most subwoofers are essentially omnidirectional. This means that they radiate sound around the entire cabinet, including on the stage. Subwoofer energy can cause feedback onstage and can make monitoring more difficult. In addition, when two subwoofers are arranged on each side of the stage in a traditional stereo configuration, there can be a build-up of energy. The resulting “power alley” is created by energy from each subwoofer arriving at the same time and in phase with each other summing together. Unfortunately, moving left or right of this center summation, one will find cancellation alleys.
Because of this, whether you’re using one subwoofer or seven, it is typically recommended that you run your subwoofers in mono, even if your main full-range system is stereo or LCR. Not only does this simplify your Aux-fed Sub mix, but it will also ensure that the same sub-frequency content is being reproduced equally.
Subwoofer Arrays
When using more than one subwoofer, it is possible to design a system forms a more directional radiation pattern that keeps energy off the stage and in the audience where it is needed more.
Ground-stacked Cardioid Array
 For smaller spaces, creating a ground-stacked subwoofer array is an easy way to focus the subwoofer onto the audience. To build a ground-stacked cardioid array, stack two subwoofers - one on top of the other - with the top subwoofer facing away from the audience and toward the stage.
Some subwoofers, like the PreSonus AIR15s and AIR18s offer presets that make creating a cardioid array as easy as selecting the Cardioid preset on the unit that faces away from the audience. This flips the polarity and adjusts the delay so that the two AIR-series subwoofers radiate in a directional cardioid pattern, allowing you greater steering control over low-frequency energy.
Endfire Cardioid Array
 An endfire array is created when subwoofers are placed front to back in a row. This focuses the sound in the direction the front speaker is facing. Endfire cardioid subwoofer arrays provide approximately 20 dB more cancellation behind the array than a groundstacked array making them ideal for situations that require the most subwoofer energy directed away from the stage.
PreSonus AIR-series subwoofers also provide a preset to create a simple endfire cardioid array with two AIR-series subwoofers. To do this, first place two AIR15s or two AIR18s along the axis to which you want to direct the subwoofer energy, arranging them so that there is 5’ from the grille of the front subwoofer to the grille of the rear subwoofer.
On the rear cabinet, select the Endfire preset. Your two AIR-series subwoofers will now radiate in a directional cardioid pattern, allowing you greater steering control over low-frequency energy with better off-axis rejection.
Setting Your Mix Up for Success
So, you’ve created an Aux-fed Sub Mix and maybe even a cardioid subwoofer array, but your mix is still muddy. Like everything in audio, even the best sounding loudspeaker systems won’t live up to their full potential if the mix isn’t right.
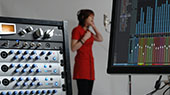
StudioLive Series III digital mixers provide several useful tools to make your sub-bass content pack a serious punch.
Sidechaining the Compressor
Sidechaining a compressor allows you to reduce the level of one input source to make room for another. For example, in some instances, a synth bass line, or a busy bass guitar part interferes with the kick drum presence and punch in the mix. For this application, you will apply a compressor to the bass channel, using the kick drum channel as the key source. Now every time the kick drum sounds, the bass channel will be compressed, reducing the dynamic range and allowing your kick drum to punch through the bass line. StudioLive Series III digital mixers allow you to use any input channel as the sidechain for either the compresor, the gate, or both for maximum sonic efficiency.

Parallel Processing
Parallel processing is another useful tool to better sculpt the sound of an instrument that is not cutting through the mix as it should. StudioLive Series III digital mixers feature a robust digital patching matrix that allows you to patch any input to any channel. In this example, let’s patch our kick drum channel to two separate channels.
A popular parallel processing method is to process one channel for sustain and big bottom end and the other for attack and punch.
On Channel 1, dial in a slow attack on the compressor with a fast release. This will allow the initial transient to remain uncompressed, emphasizing the kick drum attack so that it can punch through the mix. This will squash the low-frequency resonance of the kick drum and make it sound thinner and weaker than one generally wants from a kick drum. But that’s okay; we’re going to get that back in a minute. Use your noise gate and EQ to focus on the frequency range of that initial attack to make it as tight as possible.

On Channel 2, use a fast attack on your compressor and adjust the release to taste. This will increase the fullness of the kick drum but soften the attack. Use your EQ to enhance the low end.

Now, mix the two channels together, blending the punchy attack on Channel 1 with the fat low-end on Channel 2, creating the perfect kick drum sound.