


Practicing with your band is critical, and unless you’re already raking in those high-paying gigs, chances are, your rehearsal space leaves a little something to be desired. This article will help you to configure your room so that you can get the most out of the time you have with your bandmates.
Sound Treatment
Before you load in one piece of gear, think about how you’re going to reduce and correct what your rehearsal space is doing to the sound so that you can optimize the room for audio quality.
In general, the following physical features of a room can affect a sound system’s performance:
- Construction. Low-frequency waves can be powerful enough to cause the walls, ceiling, and even the floor to flex and move. This is called “diaphragmatic action,” and it dissipates energy and strips away the low-end definition. So if your room’s walls and floor are made of solid brick and concrete that doesn’t vibrate much, the bass response is going to be much more powerful than if you’re in a room where the walls are normal sheetrock construction, and the floors are hardwood.
- Reflectivity. Another way a room interacts with sound waves is through reflectivity. If a speaker, drum, or combo amp is placed near a reflective surface (such as a brick wall or window), the direct sound coming from it and the reflected sound coming from the wall can arrive at the listener’s ears out of phase with each other, causing cancellation and/or reinforcement. If they’re 180 degrees out of phase with respect to each other, they will cancel each other out. In any reverberant environment, position your equipment so that as much sound as possible is focused on the middle of the room and steered away from reflective surfaces.
- Size. The size of the room directly impacts how well certain frequencies will be reproduced. For example, if you measure a room diagonally, you will discover how well that room will be able to sustain low frequencies. This may seem odd until you think about the physical length of audio waves at various frequencies. For example, a 50 Hz wave is about 22.6 feet long. Because of this, a room that is 45 feet on the diagonal is going to regenerate low frequencies more effectively than a room that is 15 feet on the diagonal.
Soaking Up the Sound
 Materials that absorb sound will help to reduce reflections that make it difficult to clearly hear yourself and your bandmates. Heavy cloth, acoustic foam, pillows, and fiberglass insulation are all examples of absorptive materials. This type of acoustic treatment is best for reducing the mid- and high-frequency energy bouncing around your room. A few rugs on the floor can also help with this.
Almost any small rehearsal space is going to benefit from some acoustic absorption. Take a look around your room and look for potential culprits that could be reflecting the sound back at you. The usual suspects are the walls around you and the ceiling above your head. Remember, the smoother and harder the material (metal, glass, etc.) the more reflections it will produce.
It’s important to note that low-frequency energy behaves very differently than high and mid frequencies. So materials that absorb high and mid frequencies may not effectively absorb low-frequency energy and vice versa. To add to the problem, bass energy is not directional, so it can build up pretty much anywhere. When bass builds in a rehearsal space, intelligibility becomes an issue, and it can be difficult to get a cohesive feel because the overall blend of your instruments sounds muddy and ill-defined.
Bass traps are a special type of acoustic absorption material that reduces low-frequency resonance. Placing bass traps in your room’s corners and other boundaries (like where the wall meets the floor or ceiling) is usually adequate. If you’re handy and don’t want to damage your walls, another option is to construct a mobile bass trap by wrapping layers of carpet and carpet padding around a large frame or bookcase and mounting castors on the bottom.
Plotting It Out
In general, there are two schools of thought when setting up a band in a rehearsal space:
- Set up facing each other OR
- Set up as if you’re on stage
Both stage plots have their benefits and disadvantages. Let’s go through those before we move forward.
Face Off
 Facing your bandmates in a circle is a great way to get a feel for each other when you first start jamming or when you’re working on new material. This setup directs the sound toward all members of the band and provides the opportunity to rely on visual cues. We’ve all seen concert footage of bass players walking over to stand in front of the drum kit. This isn’t just so the rhythm section can share a private joke; it allows them to use their eyes to help their ears during complex rhythmic sections.
Ironically, the benefits that make rehearsing in a circle great at first can hurt your band in the long run. If you become too accustomed to standing in the middle of the sonic bubble you’re creating with your band, it’s going to throw you off when you’re on stage. The singer, for instance, who relies on the drumbeat smashing them in the face will now find that same beat hitting them in the back.
Visual cues can be a problem for the same reason. If the guitarist becomes reliant on watching the keyboardist take his solo on their lead synth as a cue to know when the outro starts, she might miss the audible cues she’ll need to use on stage.
We’re not going to tell you how to run your band’s rehearsal but we suggest compromise. When you’re just getting started with new material or new musicians, you need all the help you can get, so go ahead and face each other. But when your set is dialed in, and you’re practicing for that first gig, throw up some posters of adoring fans at the front of your rehearsal space, and play to them instead of each other.

Selecting a Rehearsal PA
Unless you're a power trio that plays instrumentals only, you’re going to need some kind of sound reinforcement, if for nothing else then your vocalist. Purchasing a small PA for your ensemble provides the added benefit of allowing you to play more venues and even private parties. It’s an investment in your band that will pay off in the long run.
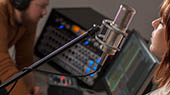
It’s All in the Mix

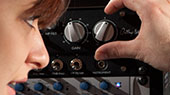
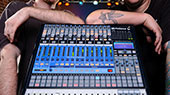
The first thing you’ll need to select is a mixer. Whether you want a small, portable analog option, a rackmount digital mixer you control from your tablet, a full digital console, or something in between is up to you and your budget. PreSonus® has put together this guide to help you with your choice.
If you choose a StudioLive® mixer, you’ll find a unique rehearsal tool built into it. Every StudioLive Series III and StudioLive AR-series mixer provides a built-in SD recorder. This allows you to record your rehearsal with the push of a button. Not only is this a great way to capture new ideas and new material, it provides some much needed intellectual honesty when evaluating your readiness for a gig.
When you’re playing in the moment, and it feels good, your band might sound better in your ears than it does to a paying audience. But imagine being able to do a full dress rehearsal for a gig and then sit down and listen to it. By adding this step, not only will you be able to tighten up any loose ends, you can use any good recordings to promote the show!
Because StudioLive mixers are also equipped with a full multi-channel, bidirectional audio interface, you can add backing tracks to make your band larger than life and add a professional edge, so your band is arena-ready, even if you’re only playing the local Moose Lodge.
Let’s Make Some Noise

Once you’ve chosen your mixer, you’ll need some speakers. PreSonus has put together a complete guide on selecting the right loudspeaker for your application and budget here, but let’s cover a few of the basics:
- Active vs. Passive. Active loudspeakers have onboard power amplification that has been designed to optimally power the drivers. This takes the guesswork out of choosing the right speaker/amp combination. Passive loudspeakers do not have an onboard amp and require an external power amplifier. When matching an external amplifier to a passive speaker, it is critical to know both the impedance load and continuous power that your passive speaker is designed to receive. Mismatching either of these will cause damage to your speaker.
- Biamplification. A biamped loudspeaker like the PreSonus AIR and ULT series has two amplifiers: one dedicated to powering the high-frequency driver and the other dedicated to powering the low-frequency driver. By separating the frequencies before they hit the amplifiers, a biamped system removes one of the major sources of intermodulation distortion. The resulting sound is more open and clear.
- Nominal Coverage. This measurement will show you how wide or narrow a loudspeaker’s horizontal and vertical coverage patterns are. Many point-source powered loudspeakers, like the PreSonus AIR series, offer a 90˚(horizontal) x 60˚(vertical) dispersion pattern. A wider horizontal coverage angle, like the 110˚ angle available in the PreSonus ULT series, will cover a broader area than the 90˚ angle available in other PreSonus loudspeaker series and most other loudspeakers in the same price class.
 Some loudspeakers, like those made by PreSonus, offer onboard DSP that provides presets for both floor monitor and mains use. This makes them more flexible, allowing you to use them as wedges during rehearsal and put them on stands for the gig.
Putting It All Together
When positioning each member of the band in the room, you want to maximize the natural ambiance of their instrument’s rig without overpowering the rest of the band.
Start with the Drums
In most situations, you will want to place the drummer at the back and center of the room. This will put some distance between the drum set and the walls, minimizing reflections and focusing the sound toward the rest of the band. In a small space, it may be necessary to put a pillow or other absorptive material in the kick drum to lower its natural volume. Tone control rings can also be added to the toms and snare drum to tame unwanted overtones. The more you can do to control the tone and volume of the drums, the more the rest of the band can lower their volume and give everyone’s ears a break.
Amps
 Guitar and bass amps should also be placed at the back of the room. Notice we said guitar and bass amps not guitar and bass players. Earlier in this article, we talked about the length of sound waves. When a guitarist or bassist is standing within arm’s reach of their amp, they are quite literally standing inside the audio waves they need to hear. It seems counter-intuitive but moving away from your amplifier actually allows you to hear it better.
Let’s also take a moment to talk about where these amps are aiming. If you’re using a small combo amp, like a 2x10 or 2x12, and it’s sitting flat on the floor, those audio waves are hitting your legs, not your ears. Tilting it back so that the speaker is pointing towards your head will allow you to turn it down because the audio waves have a direct path to their target.
Monitors
There are a couple of ways to place loudspeakers for monitoring in your rehearsal space. If your band is rehearsing facing each other in a circle while writing new material, sidefills may be the best option. This will allow everyone in the band to hear the vocals and keys.
Depending on the width of the room, this may not allow great freedom of movement because feedback is a potential issue, but you’re writing lyrics and learning chord progressions, so you’re probably not leaping off the kick drum at this point.
Once you orient the band on an imaginary stage in your rehearsal space, placing loudspeakers as floor monitors at the front of the room will provide a better listening experience for your singer and keyboardist (if applicable), while still giving enough coverage for the rest of the band to hear them.
The exception to this is the drummer. If your drummer needs to hear the vocal or other unamplified instruments clearly, you must provide them with some sort of monitoring capability. In many cases, a pair of headphones running from the mixer is the best option, especially if you can run direct lines from the bass and guitar amps. Most amps provide a direct line out for this purpose. In this way, you can create a monitor mix for your drummer, while the rest of the band uses the amps to listen to the instruments connected to them.
But why stop there?

Taking the time to make your rehearsal space a comfortable environment for every member of your band will minimize tension and help the group to become a cohesive creative unit. But just like every band, every room is different, so feel free to experiment with different orientations until you find the one that works best for you.