
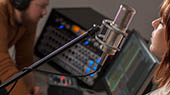


Now that we've set up our first session and configured our audio device, it's time to start recording your podcast in Studio One Prime!
Create an Audio Track
 In the upper left corner of the Arrange window, you will notice several buttons. The button furthest to the right is the Add Tracks button. Click on this button to open the Add Tracks window.
In the Add Tracks window, you can customize the track name and color, add a preset rack of effects, and set the physical source for the input and output of your audio tracks. Most important, you can select the number and type of tracks you’d like to create.

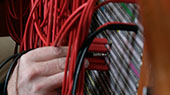
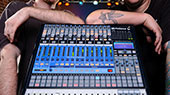
To begin recording your podcast, create one audio track and set the Input to Input 1 on your audio interface. Connect your microphone to this same input (Input 1):

Besides Audio tracks, the Add Tracks window lets you create the following Track types in Studio One Prime:
- Audio. Use this track type to record and playback audio files.
- Instrument. Use this track to record and playback MIDI data to control external MIDI devices or virtual instrument plug-ins.
- Automation. This track type lets you create automated parameter controls for your session.
- Folder. This track helps you to manage your session as well as to quickly edit multiple tracks at once.
Power User Tip: If you would like to add an audio track for each of the available inputs on your audio interface, go to Track | Add Tracks for All Inputs.
Recording Your Track
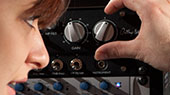
 Select Record Enable on the track. Turn up the Input 1 level on your audio interface while speaking into the microphone. You should see the input meter in Studio One Prime react to the input. Adjust the gain so the input level is near its maximum without clipping (distorting).

How high you have to turn the trim knob depends on several factors: the volume of the source, the sensitivity of the microphone (if the source is miked), the maximum input and gain range of the preamp, and the gain curve of the potentiometer. Let’s take a look at each of these factors in more detail:
- Source volume. You should always take the volume of your source - in this case, your speaking voice- into consideration when selecting a microphone and troubleshooting gain staging issues. Microphone technique can also impact this aspect of gain-staging, so be sure to review this article before getting started.
- Microphone sensitivity. In general, you must apply more gain to a less sensitive microphone, regardless of the type of source, but consider this: If you are using a microphone that is not very sensitive to pick up a source that is not very loud, and you can’t get enough gain, perhaps you have chosen the wrong tool for the job. Let’s take the common example of a shy vocalist. Not all speakers can project very loudly. This is not necessarily a bad thing, but you can’t use the same commonly used dynamic microphone to pick up a shy guest who barely speaks louder than a whispter that you would use to pick up an experience voice over artist who naturally projects to fill the room and expect the same result. While not always possible, changing to a more or less sensitive microphone can solve a plethora of gain staging issues before they've presented themselves.
- Preamp Maximum Input Level and Gain Range. As its name indicates, the maximum input level is the loudest a source can be with the preamp gain set to a specified level (usually unity) without overloading the circuit. But just like source level, this is not an independent variable. How much gain range a preamp provides also factors into how much it can amplify a source. A mic preamp like the PreSonus XMAX, which provides +60 dB of gain, will be able to amplify a signal much more than preamp with a gain range of +40 dB.
- Potentiometer Curve. Depending on the design, a potentiometer can provide most of its gain up front, with very little control, or most of its gain at the end of its throw, giving you slightly more control. In general, the “sweet spot” for most potentiometers is between one and four o’clock. This can be quite a bit further around the clockface than some people expect. And while it should go without saying, the only time you should be setting your recording levels looking at the level meter, not the marking on your preamp trim—but we’re going to go ahead and say it: Set your recording levels watching the meter in Studio One, not the knob on your audio interface.
 Click the “Record“ button in Studio One Prime and begin recording your first podcast!
To playback your recording, click on the “Return to Zero” button in the transport in Studio One Prime and then click on the “Play” button.
When you're done, make sure you save your session! Unlike a lot of free recording software, Studio One Prime lets you save your session so you can come back to it later. Because recording your podcast is just the beginning. In the next lesson, you'll learn how to make it sound like a professional quality broadcast.