
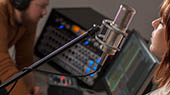


Episode 8: Multi-Instruments
In modern electronic music, sounds are rarely built from one Instrument only. Rather, they’re rather built from several Instrument “Layers”, which are then perceived as one Instrument in the mix by the listener. Multi-Instruments allow you to display these layers as one single Instrument, while still giving you full control over each individual Instrument Layer. This is highly useful to de-clutter your Mix, making it easier & faster to navigate.
Important fundamentals in this video:
- Create a Multi-Instrument via drag-and-drop. Simply drag another Instrument from the Browser onto an existing one, and then choose the combine option. Instrument Layer view can be folded or expanded by clicking the small Folder icon on the respective Multi Instrument Channel in the Mixer.
- Fine-tune your layers, then mix the Instrument! Once you’re done mixing the Layers in relation to each other, simply close the Multi Instrument folder and treat it as one Instrument in your mix going forward. Thanks to this, you only have to work with a handful of faders at a time.
Episode 9: Tracks and Channels
Have you ever noticed that when dragging an instance of Impact XT into your Song, you end up with one Track in your Song window, but eight Channels in your Mixer? Or are you perhaps struggling with unintentionally switching presets on Instrument Tracks, even though they weren’t selected? Then you need to watch this episode and learn the difference between Tracks and Channels.
Important fundamentals in this video:
- Instrument Tracks only contain MIDI information - They are not the actual Instruments! Think of Instrument Tracks as sheet music. They can be assigned to any Instrument (Channel) you want. This assignment is done from the Track Inspector (F4 key).
- You can assign as many Instrument Tracks to an Instrument Channel as you want.
- There is no 1-to-1 relationship between Instrument Tracks and Instrument Channels! Otherwise, you would always need to have 8 drum tracks in your Song, just because your Drum Instrument has 8 output channels Furthermore, you couldn’t assign Instrument Tracks to another Instrument quickly, just to quickly audition what it would sound like. Instead, you would always have to copy / paste your Events around, which isn’t effective.
Episode 10: Pattern Creation and Editing
Patterns are an alternative to the classic Instrument Parts in Studio One and especially good for highly complex variations or polyrhythms with just a couple of clicks. The combination with PreSonus ATOM pad controller makes Pattern Mode the prime choice when it comes to electronic beat making in Studio One.
Important fundamentals in this video:
- Create a Pattern by holding alt (Windows) / option (Mac) and double-clicking.
- Pattern have their own, independent loop range. This means that they loop within themselves and can thus be extended indefinitely by dragging the event longer.
- Powerful Polyrhythms. In Drum Pattern Mode, each note can have its own independent step amount, enabling highly complex polyrhythms with a few clicks. The Repeat, Probability and Pattern Automation lanes make for even more variation.
- Perfect Integration with the ATOM pad controller. Use the ATOM pad controller to record and /or program your Patterns. The LED lights always tell you where you are in your pattern. Add or remove Steps by simply tapping the respective pad.
- Add variations to prepare all of your Song rhythms within one single Pattern. Each Variation can have independent Solo and Mute settings per note!
- Drag your Pattern to the Browser to store it for later. When you recall it, the Browser will recall:
- Instrument / Plugin Preset
- Multi Channel configuration
- FX Chain
- Pattern including all variations
Episode 11: The Chord Track I - Fundamentals
The Chord Track was one of the coolest new additions to Studio One in Version 4.0. The Chord Track transposes or modulates any amount of Tracks with Chord Follow Mode enabled to a chord that you enter, which can be in any scale. Obviously, this can be used in a huge variety of creative ways. What’s really exciting is that the Chord Track works with both MIDI and Audio - with stunning results!
Important fundmentals in this video:
- The Chord Track is a global Track, potentially affecting the entirety of the Song. Any Track with Chord Follow Mode enabled will have its Events transposed to the chord specified in the Chord Track Event above. This can happen in a variety of ways, depending on which Chord Follow Mode has been set.
- Chord Track Follow Modes:
- Off. The default mode. The Chord Track has no effect on a Track in this mode.
- Parallel. In this mode, notes of the affected Track are shifted by the difference in semitones between the source and target root note. For example, the difference between C and A is 3 semitones, so all notes are shifted 3 semitones down. Then, each note of the source chord gets adjusted to match the specified target chord, if necessary. In this example, we are modulating from major to minor key - so as a result, the 3rd (which is currently sitting on C#) is shifted 1 semitone down additionally. This mode tries to maintain chord note relationships in the musical content, which may result in some out-of-key notes sometimes - Especially if the original chord has not been detected correctly.
- Narrow. In this mode, each note in the affected Track is shifted to the nearest note in the specified chord of the Chord Track (trying to avoid mapping multiple source notes to the same note, if possible).
- Bass. This is a special mode for monophonic bass Parts.
- Scale (Audio Tracks only). In this mode, notes in the affected Track are snapped to the nearest scale note in the target chord.
- Universal (Audio Tracks only). This mode does not require Detect Chords before use. In this mode, notes in the affected Track are forced to follow the scale notes of the target chord.
- The Chord Track is non-destructive. Any changes can be reversed easily by either disabling the Chord Track, deactivating Chord Follow Mode for the selected Track, or simply deleting the respective Chord Track Event.
- Audio transposing / modulating with amazing quality. Where the Chord Track truly excels is transposition or modulation of highly delicate audio material, such as vocals.
Episode 12: The Chord Track II
The Chord Track is also an amazing tool for songwriting and prototyping. By drawing in Events into the Chord Track before even one note of the song is written, every harmony or melody you’re writing will be transposed according to it. This enables you to stay closer to your original song idea.
Important fundamentals in this video:
- Focus on recording rhythms first. Keep everything on just one chord for now.
- Chord Follow Modes. Set Chord Follow Modes for each of your Tracks (except drums and other elements you don’t want to have transposed). Use the Split Tool on the Chord Track Events to mark changes in your chord progression.
- Double-click a Chord Track Event to open up the Chord Selector. Here you can choose your desired chord by either clicking it, or playing it directly from a MIDI Keyboard. Since Version 4.5, it is also possible to pre-listen the Chord Track without having to press play, or use the Audition Tool every time. You can even assign an existing Instrument of your Song for pre-listening.
Episode 13: The Arranger Track
The Arranger Track allows you to shorten, extend, rework or remix your Songs, and is especially powerful in conjunction with Scratch Pads (only available in Studio One Professional).
Important fundamentals in this video:
- The Arranger Track is a global track. Any Arranger Section that gets moved, deleted or replaced will also move, delete or replace anything that happens in the Song at the same time. If the Event boundaries extend the range of your Arranger Section, Studio One is smart enough to split the Events before they get moved.
- Change your Song on the fly! Through drag-and-drop, the Arranger Track allows you to make significant changes to your Song, which would have taken considerably longer if you did them by hand.
- Even better with Scratch Pads. The Arranger Track has incredible synergy with Scratch Pads. Rather than copying Sections that you might want to discard to the end of your Song, you can just keep them in your Scratch Pads instead, where they’re always available for auditioning without cluttering up precious screen real estate. This keeps your Song nice and tidy. You can also use Scratch Pads to store alternative versions of your Song, alternative Takes, and so much more.