
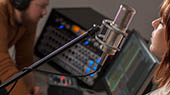


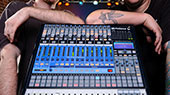

Recording a live performance is a great way to generate content for your online fan base as well as to create new revenue streams. Most modern digital mixers provide some level of integrated multitrack recording capability making live recording a possibility for musicians at any stage of their career. Some digital mixers, like the PreSonus StudioLive Series III, provide a complete recording solution that streamlines live recording and allows you to take your live mix scenes straight into the studio.
Because of the complications that can arise when using a full-fledged professional DAW to record a live performance, many modern mixers also provide some ability to record locally onboard, either via an SD card, like the StudioLive Series III mixers, or using a USB thumb drive. The good news is that many digital mixers allow you to access the onboard recording features and the onboard audio interface at the same time. This allows you to create a redundant recording, ensuring that your once-in-a-lifetime performance will be captured without glitches or technical difficulties.
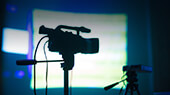
Step 1: Add a few extra microphones
 When placing microphones for a live performance, you may choose not to mic some instruments because their natural volume level alone is enough for the audience to hear them adequately. The most common instrument to skip is the guitar amp, but if you don’t mic the amp, it won’t be recorded, and you won’t get the result you want. Even if you have mute the channels in the main mix or mix them at a very low level, you’ll want to make sure every instrument on stage is connected to the mixer in some way.
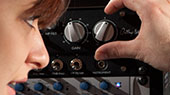
Most digital mixers offer a pre- or post-fader setting for recording channels. Regardless of whether you have to mute some channels in the mains or not, you’ll want to capture your audio pre-fader and, if possible, pre-EQ and dynamics as well. This is because the mix that you are creating in a live venue is interacting with the room, causing you to make mix decisions for the live audience that you wouldn’t necessarily make on an album.
 StudioLive mixers provide you with the ability to record post-gate and high pass filter, but pre-compressor and EQ so that your recorded tracks will maintain isolation, making mixing them much easier. As a general rule of thumb, you don’t want to print the EQ and dynamics settings you use live as they limit the mix decisions you can make later; however, these do make a good starting place for a polished studio mix… more on that in a minute.
Step 2: Configuring your recording session
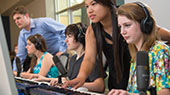
For digital mixer featuring an onboard audio interface, multitracking your live performance on a computer is the most professional route. The first step is to configure your recording application. To do this, you must first assign your mixer as the audio device, then create an input for each channel you wish to record. Once your audio device settings are properly configured, create tracks for each input channel. Be sure to name each track so that your audio files are labeled correctly.
 If you’re using Capture with a StudioLive mixer, Capture will automatically detect the type of StudioLive mixer to which it is connected and create a track for each input channel available plus a stereo track to record a mix of your choosing. Capture is a streamlined multitrack recording application that was designed to work exclusively with StudioLive mixers. And with each new generation of StudioLive mixer, tighter integration features have been added, making Capture with a StudioLive mixer the best recording solution for any live sound application.
 Tracks can be named either in Capture, UC Surface, or from the Touch Display on a StudioLive Series III console. Clicking the Keep Track Names in Sync button will transfer the track names either from Capture to your StudioLive mixer or vice versa.
Step 3: Recording
 Once you’re ready to record, arm each track for recording in your DAW application. If you’re using Capture, simply press the Arm All button.
As soon as each track is armed, you’re ready to record. Because of the way gain staging works in a digital mixer environment, setting a good mix level set on your digital mixer will ensure your recording will be distortion free. To learn more about Gain Staging, please consult this article.
 While recording in your DAW, be sure to keep an eye on the transport to avoid accidental stops and starts. One errant keystroke can ruin a live recording. Capture solves this problem by automatically engaging the Record Lock feature as soon as a recording commences. This feature prevents the recording from behind stopped by a single action. Record Lock must be disengaged first, before a recording can be stopped.
 Capture also features a Record Now function that will automatically arm every track, start the recording, and activate Record Lock, all with a single click of your mouse.
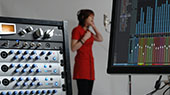
A quick note on remote control: Many recording applications provide a remote control application that allows you to use a tablet to engage and disengage recording as well as to monitor recording levels which is a great tool for live recording. Studio One offers Studio One Remote for this purpose. Rather than relying on its own app, Capture remote control is fully integrated into UC Surface for StudioLive mixers. This lets you remotely control your mix and your live recording from the same app wherever you are in the venue.
Step 4: Mixing Your Audio

After you’ve recorded your performance, the next step is to mix it. If you’ve recorded in a professional DAW, this means dialing in the levels for each track and adding EQ, dynamics, and other effects. Recording in Capture allows you to export your audio as an AAF file that can be opened in any DAW, but when mixing Capture sessions in Studio One, creating a professional mix for your live recording gets a great head start.
Here’s how:
 StudioLive mix scenes can be stored with Capture sessions. Not only does this streamline Capture’s unique Automated Virtual Soundcheck Mode, this provides an added benefit when mixing Capture sessions in Studio One. Any Capture session can be opened natively in Studio One with every edit and track name preserved. When a Capture session has a StudioLive mix scene stored with it, the Studio One console will emulate your StudioLive mixer, setting each track’s level, mute state, Fat Channel settings, and effects sends just as they were set on your mixer when the scene was stored.
 The Fat Channel plugin in Studio One is identical to the Fat Channel that runs natively on the StudioLive DSP, so you're your EQ and dynamics settings are preserved with the added benefit of being editable, allowing you to make any adjustments necessary. This means that all you need to do is drag and drop in your favorite effects plugins to the effects buses in Studio One and you’re ready to start mixing your audio just as it sounded from Front-of-House at the performance.
This can be a great time-saver because the fundamentals of your mix are much more than halfway to a finished product, letting you finish your mix fast and get it out to your fans while the memory of the show is still fresh in their memories.