


It’s happened to everyone. You turn on your gear that worked great yesterday and something’s not working the way it should. Or you set up your PA system the same way you always do and everything is humming a tune you don’t want to hear. The most important advice you will ever receive in any troubleshooting situation is this:
Take a deep breath.
The worst thing you can do is panic, get frustrated, or lose your temper. If you have to do so, go ahead and do all three, but then, take a deep breath.
Troubleshooting is largely an exercise in patience and methodical logic. This article will guide you through some of the most common problems we’ve all encountered and how to solve them.
Problem: No Sound
Step 1: Is it plugged in?
No, this is not a joke. Check. Go on, we’ll wait.
 PreSonus puts blue power indicator lights on just about every piece of equipment we make for a reason: so you can see at a glance if there is power coming into the unit or not. If that little light is dark, then start at the source and work backward.
A word of caution: Always mute your audio source before you start looking for the reason your system isn’t producing sound, especially if the darkened little blue light in question is on your powered speakers. Your ears are more important than the few seconds you’ll save walking back to the console to raise the level of your program music to test your theory. Don’t ask us how we know this, just trust us on this one.
- Is it turned on? You’d be surprised how often that power switch is simply in the wrong position.
- Is the female end of the power cable seated in the piece of equipment or its power supply? Unless they’re locking, 3- and 2-prong power cables (also known as IEC3 and IEC2) can wiggle loose inside their housing and look connected when they’re not. Push it all the way in and make sure that the connection is fully seated.
- Is the male end of power cable plugged all the way into the power outlet or surge protector? This happens more often than you’d think, usually because someone stepped on the cable in their haste to set something else up. Just sigh and plug it back in.
- Is the surge protector turned on? Again, this is usually the victim of an errant shoe stepping where it shouldn’t have been stepping, but check.
- Is the surge protector working? Especially if you’re using an affordable surge protector or a basic power strip, this is always a risk. If everything else checks out, swap it for a new one.
- Is the surge protector, extension cord, etc. connected to a power outlet? It’s really easy to lose the end of a power cord in a snakes’ nest of other cables, so we recommend that you physically trace this one to verify.
At this point, you’ve traced the problem back to the source and you can start considering some more inconvenient causes:
- In rare instances, the external power supply for your gear may have failed and you’ll need to buy a replacement. If it’s a PreSonus power supply and it’s still under warranty, contact us through your My.PreSonus account and we’ll send you a new one. If it’s out of warranty, you can purchase a replacement from the PreSonus shop.
- In even rarer instances, the fuse in your equipment may have blown. Not all gear has a fuse or a user-replaceable fuse, but if yours does and all of the above fails, then you may need to take a visit to your neighborhood electronics store for a new one. Always check your user documentation before attempting to replace a fuse.
- And in the rarest of instances, the internal power supply or something connected to it has failed and you’ll need to contact the manufacturer for a repair. If it’s a piece of PreSonus gear, you can handle this all through your My.PreSonus account. If you don’t have a My PreSonus account and have not registered your PreSonus products, please take a moment now and register them.
Once you’ve verified that the equipment is all connected to a power source and turned on, you can move on to the next step.
Step 2: Is it plugged in?
Nope, still not a joke.
 Audio cables break, get disconnected, get connected to an input instead of an output, and dozens of other possible problems because musicians and audio engineers are doing a hundred things at once, usually in the dark, and usually in cramped, uncomfortable spaces.
As the saying goes, pride goes before the fall, so forget self-recriminations and finger-pointing and just check every connection from the beginning of your signal chain to the end. If the problem has occurred in a fixed installation (home studio, installed sound system, etc.), you might want to check the last piece of gear that was added or moved first.
If all the connections check out, then a cable may have gone bad. And cables do go bad. Solder joints break and the internal wires fray. If you have a cable checker, use it. If you don’t, try swapping the cable and see it the problem “follows” it.
Step 3: Is it plugged in where you think it's plugged in?
Is channel 3 really your snare mic? Did you check?

If you’re not getting sound from one or two sources on stage or in your studio, this is probably the problem. A quick cable trace to your stagebox, mixer, or audio interface can save you hours of hair pulling.
This goes double for recording in a DAW. Open up your I/O configuration and make sure the driver input you’ve selected is connected to the physical input you think it is.
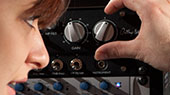
Step 4: Faders and Knobs
 They get turned down. They get set too low. They just do. If you see input signal on your mixer, but nothing is coming out of your mixer, check the channel fader, the main fader, and the level controls on your speakers.
If you don’t see any input signal, did you skip Steps 2 and 3?
Step 4: Mutes and the Rude Solo
We know what you’re thinking: Best. Band. Name. Ever.
All kidding aside, these are the sneaky culprits that catch even the most experienced audio engineer off guard. As apparent as mute lights are, they are still devilishly easy to overlook, so take a look around your mixer for those red lights.
This brings us to our friend: Destructive solo.
While destructive soloing makes sound check and mixing in the studio so much faster, one little solo button pressed in on a dead channel can kill the sound to your entire system. Again, just check.
 If you’re in a DAW, you should also verify your output routing and make sure your monitoring preferences are configured correctly. This is true even if it was all working correctly yesterday. Countless studio hours have been wasted because the audio driver switched to “built-in.” Open up your audio preferences and verify that everything is set correctly. For example, if you launched your DAW before your audio interface was powered on, it will have, most likely, defaulted back to the internal soundcard and will stay that way until you tell it otherwise.
Studio One makes this easy. Just take a look at the Setup section of the Start page and make sure your interface is selected.
Click on “Configure Audio Device…” to verify your routing and driver settings.
Problem: Audio Imbalance
If one side of your system is louder than the other, there are few easy things to check:
- Output level. Make sure that both speakers are set to the same level.
- Pan position. If your source music is connected to a stereo channel, verify that the pan control is set to center position. If your source music is connected to two mono channels, make sure that the pans are set hard right and hard left.
- Filters and EQ. Many modern powered speakers are equipped with some kind of EQ or high-pass filter. Make sure that the settings on both speakers are set the same.
 When one speaker doesn’t sound like the other side of the stereo pair, you may have a hardware issue to look at. If it has all high-end with a distorted or absent low-end, the low-frequency driver may have blown. No high-end? Then it could be the high-frequency driver. If you’re a fairly handy person, most low-frequency drivers are user replaceable. Because of molded enclosures, the horn assembly can be a little more challenging and you may want to consider sending in your entire speaker for repair. Whatever your skill level, if you’re using PreSonus loudspeakers, please contact us through your My.PreSonus account if anything goes wrong with your speakers and we’ll help you to resolve the issue as expediently as we possibly can.
Studio monitors are also subject to blown drivers and are likely not serviceable outside of the factory that built them. This is true for all PreSonus studio monitors, please contact us if you need a repair.
Problem: Mystery Noise
Sometimes it’s not that your system isn’t making sound, it’s that it’s making the wrong sound. Hum, distortion, and hiss can ruin any show or recording and it’s always better to try to solve the problem than to live with it.
- Hum. Whenever possible, try to unmask the source of your hum by simplifying your system to the fewest components possible and adding each device, one at a time, until you find the cause. Once you’ve located the source of the hum, you can be reasonably assured that a grounding problem is probably making it and there are a few causes:
- Unbalanced cables. Using unbalanced cables on balanced connections is never a good idea. If your gear has TRS outputs or inputs, use balanced TRS cables. If you must connect an unbalanced output to a balanced connection (i.e. a synth to a mixer), you may need to add a D.I. box to alleviate grounding issues.
- Broken balanced cables. A broken balanced cable can also cause hum. Swap the cable just to check.
- Shared power outlet. All your audio devices should be connected to the same power outlet to prevent ground loops from occurring. Invest in high-quality power strips to assist you. All your gear should be connected to power strips which are, in turn, connected to the same power outlet. That being said, not all power strips are created equally, so invest in the best power you can, because lower quality power strips can contribute to noise problems over time.
- Audio cable and power cable coils. Audio cable cannot be run next to power cable. Say it with us. Do not do this. Also, coiling audio or power cable essentially creates an antenna that can pick up all kinds of audio garbage and push it out through your speakers. When coiling cable, make big uneven loops to prevent this and whenever possible, use the shortest cable length you can to avoid creating coils altogether.
- Hiss. Every audio component, no matter how high its quality, will have some inherent noise. The level of this noise is produced by the device itself. For analog devices, this level is documented in the Signal-to-Noise ratio documented in the audio specification. This is level the input signal must exceed to overcome the device’s noise. Hiss is generally caused by improper gain staging where something at the beginning of the signal chain doesn’t have enough gain and something later on has too much. More information on gain staging can be found here.
- Distortion (and not the kind you like). While distortion may be great for guitars and overdriven vocals as an effect, it probably isn't what you're going for in your overall mix. If your system is distorting, either something is broken, or something has too much gain. If you’re not seeing any red O/L lights, and the output is very low, whatever is producing the distortion probably needs a new tube (if it has tubes) or it needs repair. This can be true of a mic, a preamp, a guitar amp, or a loudspeaker. Distortion plus low output is always bad news.
Regardless of the problem you’re encountering in your system, there is always a solution, even if that solution requires a repair and the PreSonus Service Team is here to assist you. If you’ve gone through these tips and your PreSonus equipment is still causing you a headache, log into your My.PreSonus account and contact our team for more advanced troubleshooting steps.