
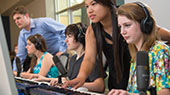


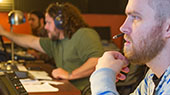

Although worship teams deal with different scenarios and levels of user sophistication, they share many common needs, aspirations, and questions. We’ve put together this tutorial to provide solutions for some of the most commonly asked questions to help your worship team accomplish its goals.
What is a mixer and why do I need one?
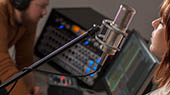
 Whether your house of worship has 100 members or 1,000, many modern religious services require more than an organ and a choir to lead a praise service. When you add a praise band, individual vocalists, or multimedia experiences, you need a PA system to bring their message and inspiration to your congregation, and the central component of a PA system is the mixer.
At a basic level, a mixer does exactly what its name implies: mix audio signals together and sum them together. If you have more than one sound source (say, five microphones, an electric guitar, a piano, and an organ), you need a mixer to combine these audio signals so that you can control the relative balance between them before sending the summed signal to a loudspeaker system, recording device, etc.
Because every signal comes into and out of the mixer, investing in a quality product as your foundation will save a lot of operational headaches and money on peripherals. The first thing to consider when purchasing a mixer is how many channels you will need. Also known as “frame size,” the number of channels on a mixer determines how many sources you’ll be able to connect to it.
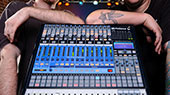
In general, there are two flavors of mixer: analog mixers and digital mixers. An analog mixer relies on electric circuits and filters, whereas a digital mixer converts the analog signal of your praise team into digital audio that is then sent to an onboard processor. Known as a digital signal processor (DSP), this processor is responsible for routing, level control, and dynamics processing (among other things). The signal is then converted back to the analog domain where it can be sent out to your speakers, personal monitoring systems, etc.
While both mixer types will provide basic level and pan control, each has unique advantages and disadvantage. The advantage of the analog mixer is that it is generally less complicated and less expensive. The disadvantage is that analog mixers usually have fewer onboard features, and their sound quality is wholly reliant on the quality of the analog circuitry.
Good news: PreSonus® StudioLive® AR-series analog mixers combine great-sounding analog circuitry with the best of digital recording for a compact, affordable mixing solution. More on that later…
The advantage of the digital mixer is that it provides many onboard tools that will ultimately save you money by replacing expensive outboard equipment (equalizers, compressors, noise gates, multi-effects units, and the like). While, you don’t need these processors to mix audio, they are essential for producing better sounding, more polished mixes. Unfortunately, with more complexity comes a steeper learning curve. This can make learning a digital mixer a daunting task.
 PreSonus StudioLive digital mixers changed all that, providing a wealth of onboard processing without forcing you to dive into multiple layers and menus. This surface-driven workflow has made them one of the most popular mixers in the world. Because the EQ, compression, noise gate, and limiter are available on every input and output, you save both the cost of buying expensive outboard gear and mountains of cables and the hassle of connecting it all to your mixer and hiding all those cables.
StudioLive Series III digital mixers build on the StudioLive legacy by adding even more onboard processing, plus many improved features, while retaining the same ease of use that has made StudioLive the preferred choice of worship teams worldwide.
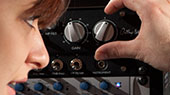
Good news: You don’t have to know how to use a compressor, noise gate, or EQ on a kick drum or vocal to use these processors on the StudioLive Series III digital mixer. Every StudioLive digital mixer comes with channel-strip presets for the most common instruments. Simply load it and go. StudioLive Series III digital mixers make this even easier by providing a custom User view, so you can select only the most necessary controls to view, simplifying the Fat Channel for novice users.
Digital mixers also provide tools to address the problem of managing complex mixes. Population groups reduce the channels you’re viewing at one time. DCAs (Digitally Controlled Amplifiers) control the overall level of a group of channels.
Good news: StudioLive Series III digital mixers combine the best aspects of these solutions with Filter DCAs. A Filter DCA can contain any combination of the available input channels and effects returns, and you can create as many Filter DCA groups as you need. StudioLive mixers allow you to include the same channel in multiple Filter DCAs so you can manage mixes in multiple ways. Each group is given a master level control so you can control the overall level of the group while maintaining each channel’s relative balance in the mix. In this way, for example, you can create a single fader to control every drum in a monitor mix and maintain the relative level of the drum mix that you created. You can even create a custom User fader bank that includes individual channels and Filter DCA group masters to simplify mixing even further for volunteers.
How do we budget for personal monitor-mixing systems?
Most mixers have some ability to send at least a universal monitor mix to the stage. This is typically done with auxiliary buses (aux buses for short). Let’s say a mixer has one aux bus. On a mixer like this, each channel would have an aux send level control. This control adjusts the volume of each channel in the aux bus mix. You build your monitor mix by setting the individual aux-send levels for any channels you want in that mix. The aux mix output can then be connected to a stage monitor. In this way, your musicians can listen to a monitor mix that can be controlled separately from the main mix going out to the congregation.
 If you’re thinking an aux send sounds a lot like a channel fader, you’re way ahead of the game. Just as each channel fader allows you to create a mix for the main output, each aux send allows you to create a mix for the corresponding aux bus output. (Aux sends can also be used for other things like routing controlled amountsof signals to outboard effects.)
If you’re using aux buses exclusively for monitors, the number of aux buses you have determines the number of discrete monitor mixes you can create. Most affordable mixers have one or two. Two aux buses provide two separate mixes; six aux buses provide six separate mixes; etc. Note that aux buses and their sends are typically mono, so a performer who needs a stereo monitor mix (such as a keyboardist using stereo in-ear monitors) will need two aux buses: one for the left side of the mix, one for right. Keep this in mind when determining how many aux buses you need.
Good news: StudioLive mixers have lots of aux buses for creating discrete monitor mixes: 2 to 32, depending on model. Every aux bus on StudioLive mixers feature feedback-busting, frequency-balancing, dynamic-processing goodness thanks to the Fat Channel. This allows you to create high-quality, individual mixes for your performers without spending additional funds beyond the cost of the StudioLive and monitors.
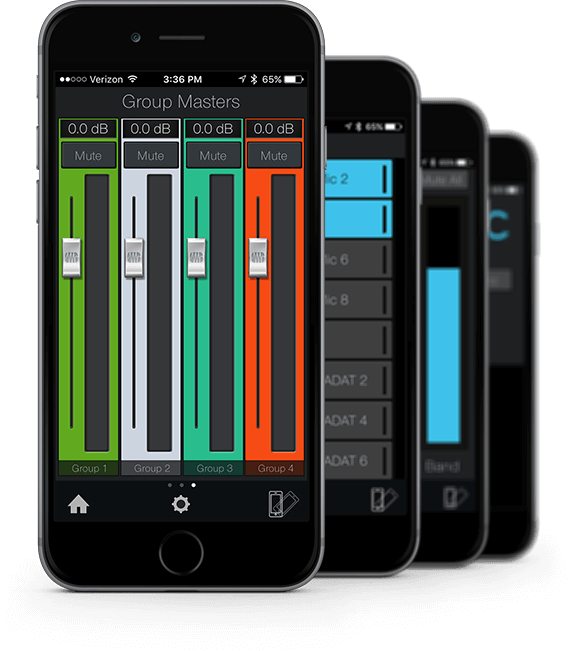 Even better, aux mixes on StudioLive Series III digital mixers can be wirelessly controlled from wireless mobile devices using free software. With free PreSonus QMix®-UC software for iPhone®, iPod® touch, and Android™ devices, up to 16 worship musicians—and for that matter, the choir director and pastor—can simultaneously control their own StudioLive monitor mixes.
QMix-UC makes creating monitor mixes easy with the Wheel of Me view. This lets you select multiple "Me" channels and turn them all up in your monitor at the same time, while controlling the relative balance between “Me” and the rest of the band.
More advanced users can have complete control of the aux-mix send level and panning (for linked auxes) for each channel from the Aux view. These users can also create four custom groups. This allows them to divide complicated mixes into something more manageable.
Using the StudioLive security features, you can let each musician create a personal monitor mix—or restrict them to the Wheel of Me while you create their mix for them.
Good news: Because QMix-UC remote controls the aux mixes on the StudioLive mixer itself, an experienced mixer volunteer running the main system can assist less-experienced praise band members with monitor mix issues, without leaving the front-of-house position. Because this mix is coming directly from the mixer and not from a personal monitoring system, the front-of-house engineer can even listen in on any monitor mix to better assist in creating the best mix possible.
 For praise team members that are more comfortable with a hardware mixer, rather than a touchscreen, there are many hardware personal monitor mix systems that can be integrated into either a digital mixer or added to an existing analog system. A personal monitor solution like this is compromised of three essential components:
- The personal monitor mixer that the user controls
- The switch that routes audio to each personal monitor mixer
- The hub that connects to the main front-of-house mixer
Until recently, personal monitoring solutions have been very expensive and very low-frills. PreSonus EarMix systems changed all that by providing a 16-channel personal monitor mixer with 3-band EQ and limiting on every channel. Since the hub for EarMix personal monitor mixers is a StudioLive Series III rack mixer, EarMix 16M monitor mixers are provided with Noise Gate, Compression, and EQ on every channel, plus reverb and the busing necessary to simplify large mixes.
Because of the advanced audio networking built into StudioLive Series III digital mixers, EarMix 16M personal monitor mixers can be connected directly to a StudioLive Series III console mixer. All audio can be routed directly from the touch display on the StudioLive Series III console mixer, simplifying set-up and integration.
How can I get better at mixing when I can’t hear the speaker system very well from the mix position at my church?
Although the mixer is the core of a good PA system, it is often tucked out of the way either because of space constraints, or to hide the cables and the mixer’s flashing lights, or to keep the mixer safe from curious young congregants. The problem is that hiding the mixer usually means locating the sound person away from the “sweet spot.” This is the middle position between the two sides of a sound system, where the speakers overlap, and it is where the sound reproduction will be the most accurate, making it easier to dial in a great mix.
In situations where the mix position is not centered within that optimal overlapping listening area, you’ll get a lot of exercise running to the ideal listening position, listening for problems, running back to the mixer to correct the problems you heard, and then running back to the sweet spot to verify the problems were corrected. Obviously, this is not a desirable way to mix.
 Some modern mixers have solved this by allowing you to remotely control the mixer from an iPad or laptop. This allows the mixer to be placed pretty much anywhere in the sanctuary. This can save hundreds of dollars on long cable runs, because the mixer can even be placed at the side of the stage (also known as monitor position), while the front-of-house mix is controlled remotely from an iPad. This is especially great for mobile churches!
Good news: You don’t have to stay at the mix position. UC Surface for iPad and Android provides direct, wireless control of every StudioLive Series III mixer function. Available free from the Apple App Store and Google PLAY Store, UC Surface allows you to wirelessly control both the front-of-house and monitor mixes, input and output processing, routing, and more, from anywhere in the sanctuary, with just your mixer, a tablet, and a wireless router. Even better, the volunteer running sound for your service doesn’t have to be isolated from the rest of the community. They can sit with their family and friends while mixing services right from their pew!
Should we record our services?
Yes! Recording your services allows you to do more than simply archiving your pastor’s most powerful sermons or to hand out song recordings to new praise band members. Recording your service can offer terrific opportunities to reach out into your community and even fundraise for youth groups and missions (more on that in a minute).
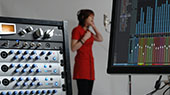
 The professional solution for recording to a computer is an audio interface, such as the PreSonus Studio- or Quantum-series. An audio interface converts analog signals to digital and vice versa, routing digital audio to and from a computer via USB or Thunderbolt. Audio interfaces generally have better A/D and D/A converters than you’ll find in most computers, and they often provide additional features, such as high-quality mic preamps, phantom power to operate condenser microphones, and more. Models range from single or dual channels on up to eight channels and even more.
Luckily, professional-quality audio interfaces for your computer are now affordable and abundant. Using these with some decent mics is a great solution for any recording application. An added bonus of recording directly to a laptop or desktop computer is that you can more easily edit and mix your recording, burn it to a CD, and post it to the Web.
 Good news: If you’re recording a worship service, you already have all your instruments and microphones connected to a mixer, so the problem becomes figuring out how to get the signals into your audio interface at the same time. This isn’t impossible but it is going to involve advanced setup, cabling, and more than a little audio know-how. PreSonus has removed this hurdle with the StudioLive mixers by building in a professional audio interface that allows you to simply connect the mixer to your computer and hit Record in the included Capture™ recording program—no cabling, patching, or signal-routing involved. Capture makes recording even easier with its unique Record Now"feature. This button creates a new session, arms all tracks for recording, and starts recording instantly, with one mouse click!
 Most people on the PreSonus staff are musicians and audio engineers, and many of them perform, mix, and record for their churches. PreSonus Capture live-recording software, included with all StudioLive mixers, installs easily, requires no setup because it is designed specifically for the StudioLive and lets you record the individual tracks and/or a stereo mix with one mouse click. Capture knows which StudioLive mixer you’ve connected to your computer and automatically creates a track for every input channel and a stereo track for recording your main mix.
Good News: StudioLive Series III console mixers take this one step further by providing an onboard SD recorder with Capture built in, allowing you to create multitrack recordings without connecting a computer! Stereo SD recording is available onboard every StudioLive Series III rack mixer as well as the StudioLive AR-series hybrid analog mixers.
What else can we do with our recordings?
Once you’ve recorded your worship service, the next step is to do a new mix in a more controlled environment. This allows you to add new processing, remove microphone handling noise, and level out any fluctuating signals. To do this, you’ll need digital audio workstation (DAW) software. To this end, PreSonus StudioLive mixers also include a powerful, yet easy-to-use, professional recording and mixing application: Studio One® Artist.
If you have a StudioLive mixer, you can start by simply recording the stereo mix, in real time, directly to the stereo track in Capture. But you don’t have to choose between recording a stereo mix and recording individual tracks.
Stereo mixes have their disadvantages, especially if you’re simply recording the main mix that is also feeding your house speakers. Let’s say the guitar amp is loud enough in the house that it doesn’t need to be reinforced through the main sound system. If the guitar is not in the front-of-house mix, a recording of that mix won’t include guitar. Vocals are typically very loud in the house mix so that they can be clearly heard; if you record the house mix, your recording would be too vocal-heavy.
Because you have all the individual tracks recorded, as well, you can dig into Studio One to do a proper mix with those later and make the highlights available as an online archive, or create CDs or MP3s to sell as a fundraiser (more on that shortly).
Beyond that, there’s a handy shortcut if you want to record the whole event, yet post only one or more sections. Normally, this would require listening to the playback after the event and editing the digital audio file—but not when you record with PreSonus Capture. Capture lets you easily drop markers at strategic points while recording. You might, for example, drop markers at the beginning and end of the sermon, drop markers at the beginning and ending of each choir performance, and so on. Then after the service, with a few clicks you can easily tell Capture to export the sections between specified markers as separate audio files. Voila! Your hard drive now contains a file with just the sermon in one file, each choir performance in a separate file, etc. And you still have the original recording of the entire service.
If you need to do some basic editing before you post to the Web, such as trimming dead space from the beginning or end of a recorded section, Capture lets you do that too. If you need more editing control, such as pasting a stock intro onto the beginning, or using software signal processors to sweeten the sound, you can do that in PreSonus Studio One Artist, included free with every PreSonus StudioLive mixer and audio interface. Studio One Artist rivals many audio editors costing hundreds of dollars.
Good news: Just as Studio One Artist is integrated with all PreSonus audio interfaces, it’s also integrated with Capture! Simply open your Capture session from within Studio One, and all your tracks, track names, markers, edits, and even your StudioLive Fat Channel come with you. No importing or conversion necessary!
 Moreover, when you record with Capture and a StudioLive Series III digital mixer, you can save the mixer scene with the Capture Session. A StudioLive Series III mixer scene contains virtually all the mixer’s key settings, such as fader levels, buses, routing, EQ settings, and dynamics processing. When you open the Capture Session in Studio One, your StudioLive mixer scene loads in Studio One, as well—including the Fat Channel processing. The result is that the mixer in Studio One configures itself just like your StudioLive Series III digital mixer when the scene was stored.
All fader levels in Studio One will match the levels set on your StudioLive Series III digital mixer. Each channel will already have Studio One’s Fat Channel plug-in inserted and loaded with the same settings you dialed in on the StudioLive Series III digital mixer. Even mutes, solos, and effects sends will be set just as you stored them. Now you can work with the recording at home while the mixer stays in the sanctuary, yet your recording will sound the same in Studio One as it did during the service. This provides a great starting point for any live mix because you don’t have to redo all the good work you did while you were mixing the service.
Good news: The Studio One Fat Channel plug-in is fully compatible with UC Surface for StudioLive Series III digital mixers. So, if you create a preset you want to try out at the next service on your mixer, you simply save it a preset for UC Surface. From UC Surface you can load it remotely on your mixer or save it directly to your StudioLive’s Fat Channel preset library. All presets created or stored in UC Surface automatically show up as presets for the Studio One Fat Channel, so your Fat Channel settings can go from sanctuary to studio and back!
Can this technology help us train new volunteers?
The volunteers at your church keep it running. You rely on them for everything from answering the phones when the secretary in the office has the flu to operating the mixer or playing bass during Sunday services. Training your volunteers so that you get the most out of the investment you made in your PA system can be as challenging as creating a pool of musicians for your praise team. This is where virtual soundcheck can save training time and frustration for everyone involved.
As its name implies, virtual soundcheck allows you to check the sound of your praise band “virtually” – that is, without the band. Many modern digital mixers provide some way to do this (some more complex than others) but only a couple have a true virtual soundcheck that is completely integrated into the mixer. StudioLive Series III digital mixers can provide this amazing experience through Capture’s unique Virtual Soundcheck mode.
The first two steps in training your new mix volunteer should be turning on the StudioLive Series III digital mixer and launching Capture on a computer that’s connected to the mixer. Once Capture is launched, the new volunteer just needs to click the Virtual Soundcheck button and pick one of the pre-recorded services you have stored on the computer. This will load the recorded audio onto the tracks in Capture, complete with track names, and engage all the digital returns on the StudioLive Series III mixer. Your new volunteer can now play back audio through the system and get acquainted with the mixer without being nervous about making a mistake in front of the congregation. Once they are comfortable with Capture and the basics of the mixer, they can come in on their own to practice.
 Good news: StudioLive Series III consoles take virtual soundchecks to the next level by allowing you to use one of the recordings you’ve make on an SD card, making it even easier for new volunteers to get comfortable with a digital mixing environment.
Virtual soundcheck also comes in handy when musicians are running late because of other commitments, enabling you to dial in a great mix while you’re waiting. When everyone has arrived, simply click the Virtual Soundcheck button again to remove the audio from the Capture session, disengage all the digital returns on the mixer, and arm every track in Capture for recording so you can record the rehearsal or service.
Good news: Track names in Capture are broadcast throughout the StudioLive Series III network. This means that when your virtual soundcheck is done, the channels on your StudioLive mixer, in UC Surface, and in QMix-UC are labeled and ready to go.
Virtual soundcheck doesn’t just make life a little easier for the people behind the mixer; it can also help your praise leader create a team of musicians and elevate everyone’s skill level. Using virtual soundcheck, your praise leader can practice with one or two new musicians during the week using a full pre-recorded band, without needing to organize a big rehearsal.
Good News: Capture can be completely controlled from within UC Surface, so novice and pro users alike only have to manage one window for remote mixing and recording.
What’s the best way to sing/play along with background tracks?
Easy. Just use the Capture or Studio One software to record backing tracks in advance. For playback, press the appropriate Digital Return buttons on the StudioLive mixer to route the tracks back through channels on the mixer. You could prepare something as simple as a full stereo mix for a performer and the congregation to sing along with, or as advanced as individual tracks that members of the praise band have previously recorded to embellish a performance. The keyboardist, for example, might prerecord some orchestral tracks while they play the main piano part live.
In some of these situations, you’ll want one or more members (usually at least the drummer) playing to a click track. A click track is basically just a metronome that makes it easy to sync up the live performance with the prerecorded tracks. Since you don’t want the audience to hear the click, mute the corresponding mixer channel in the main mix and just send it to the aux sends for the appropriate performers’ monitors.
Good news: There are many online services that provide high-quality multitrack versions of contemporary Christian worship songs. These allow you to either fill in the gaps in your praise band or fill out your already amazing worship-team lineup with string sections, harmony or backing vocals, and more. Using these tracks in Studio One is as easy as drag-and-drop. Studio One’s browser lets you see every audio file on your computer and drag it into a session. It will even create an audio track for you! These tracks can be used live in the same way as pre-recorded audio tracks and can be a great way to add a special touch to both weekly and holiday services.
What else can we do with our multitrack recordings?
Multitrack recordings can be a great way to attract new congregants, send your pastor’s message out to the world beyond your local community, and provide the congregation with easy access to inspirational sermons and music. But like any public engagement, you want to put your best foot forward. While the stereo mix you record in real time and upload to a service like SoundCloud can be a great way for sick and elderly congregants to feel connected to their community when they can’t attend services, it’s not the best quality that it can be. This is where the integration between Capture, StudioLive Series III digital mixers, and Studio One comes in.
 As we already mentioned early, you can simply launch Studio One and open your Capture session. Unlike most DAWs, bringing in additional tracks or loading plug-ins is as easy as drag-and-drop from Studio One’s browser. A plug-in is a piece of software that adds processing functions within a recording application (reverb, delay, compressor, EQ, etc.).
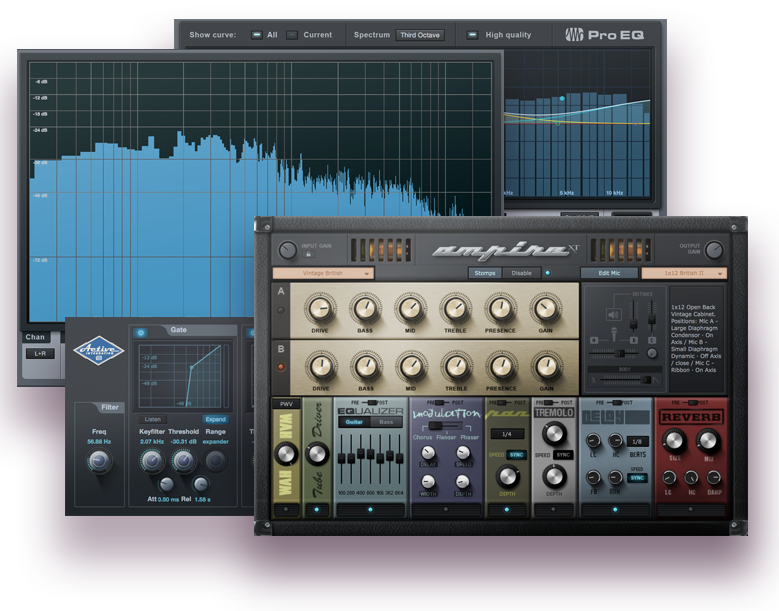
From within Studio One, you have access to a complete suite of signal-processing plug-ins and everything else you need to create a polished, professional quality mix of your service.
Plug-ins can also be used for processing during services. For example, if you need a guitar amp but don’t have the space for one, you can insert Studio One’s Ampire XT plug-in on the guitar player’s track in Studio One. Engage the digital return on the guitar player’s mixer channel, and you can use the processed signal during services while your guitar player is playing live and being recorded in Studio One!
Need to cut out just the sermon? Studio One makes it easy. Simply make a cut in the audio file at the beginning of the sermon and another at the end, then drag the clip to the file browser in Studio One to save it as a standalone audio file that can be accessed from other Studio One or Capture sessions.
 Good news: PreSonus understands that not everyone is an audio engineering prodigy, so the company has spent years creating an extensive library of online videos that cover nearly every aspect of recording, mixing, and mastering in Studio One. In addition, PreSonus offers an online Knowledge Base and active forums where Studio One users and PreSonus staff swap tips, tricks, and ideas. PreSonus also presents workshops at a variety of events, some of them specifically created for worship teams.
While Studio One Artist provides all the tools you need create a polished mix, upgrading to Studio One Professional will unlock the full potential of this software. Studio One Professional is the first and only DAW that provides an integrated mastering application and a way for you to upload final mixes direct to the Web.
 The Project page is a dedicated mastering solution that is integrated into Studio One Professional. Here, you can burn industry-standard Red Book audio CDs, create high-quality MP3 albums, and much more. Songs and audio files are arranged as a sequence of tracks on a continuous timeline.
You can apply effects to individual tracks, as well as to the master output track, to achieve sonic continuity throughout the project. The integrated browser makes importing songs, audio files, and audio effects fast and easy. Studio One songs can be imported directly into your projects without having to export a song mix. After a song has been imported into a project, you can go back and change the song mix, and the project will be automatically updated. No other DAW offers this kind of seamless workflow.
We’ve already mentioned SoundCloud as a way for congregants to easily stream services by simply clicking on a link. From the Project page in Studio One Professional, you can upload directly to SoundCloud. This integration provides a direct way to reach the world with your praise team’s message and can widen the scope of your church’s reach.
Good news: Your pastor’s sermons speak to your congregation; now they can speak to the world through your Web site, too! SoundCloud allows you to create an archive of sermons on your site that people can download to their mobile devices and listen to again and again for inspiration and comfort.
Before you distribute a CD or stream audio content on your Web site for which you don’t own the rights, you need to obtain a mechanical license from the copyright owner or administrator. This may sound daunting but there are many resources to ensure that you are in compliance with the law. This will also guarantee that artists providing the inspirational material you use are getting paid so that they can create more material for you to enjoy.
While there are several options to get a mechanical license, perhaps the simplest is to subscribe to an annual or single-use licensing service that specializes in Praise and Worship music, like Christian Copyright Solutions (CCS), Church Copyright Licensing International (CCLI), or OneLicense. These services provide blanket licenses for performances, audio streaming over the Internet, printing lyrics in bulletins, duplicating sheet music for choir members, and reproducing music for distribution. By subscribing to one or more of these services you can use any song in their catalog for a variety of purposes, depending on the type of subscription you have.
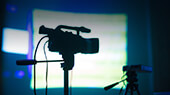
How do we get a good soundtrack for our videos?
The built-in mics on most video cameras don’t give professional results. There are several ways around this. Assuming that the camera has an external audio input (many do not), the most direct method is to bypass the camera’s mic by connecting an extra StudioLive StudioLive III subgroup output or aux output (or pairs for stereo)—complete with Fat Channel processing—to the camera’s external audio input.
Good news: For even more polished productions, Studio One Professional supports QuickTime (.mov) video playback within its audio-production environment. While watching video clips in Studio One Professional, you can extract the audio, process it for better sound, then dub it back into the video.
There’s an even better solution, though: While videotaping, use Capture to record the live audio to the computer. Afterward, in Studio One Professional, tweak the mix as needed and completely replace the entire audio track of your video with the much more polished version.
All these digital tools sound great, but we’re a small mobile church just starting out.
 While the StudioLive Series III digital mixers provide a wealth of features and advanced processing in an affordable package, for small, mobile churches, they may still be out of reach. This is where the StudioLive AR-series analog mixers come in.
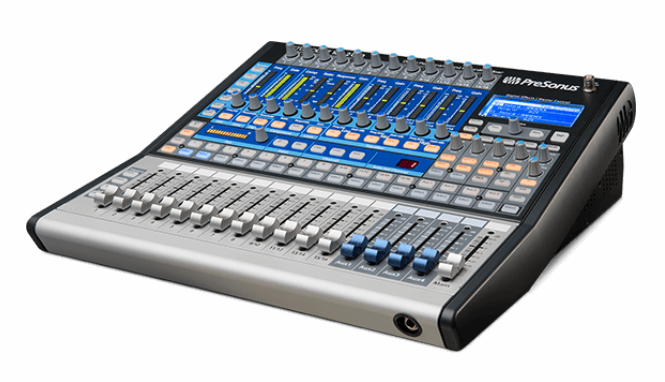
Available in 8-, 12-, and 16-channel frame sizes, StudioLive AR-series analog mixers provide EQ on every channel, monitor mixes, and an onboard effects processor to add reverb and delay to create a more polished mix.
Each StudioLive AR-series mixer features a unique Super Channel. This flexible stereo channel allows you to connect four stereo line level devices, including wireless streaming over Bluetooth – perfect for praise leaders to teach new songs to the worship band.
An onboard SD recorder lets you quickly record the main mix or playback hours of stereo recordings. Like their larger, digital cousins, the StudioLive AR-series mixers are equipped with an integrated USB audio interface that allows you to record every input channel, plus the main mix and playback two stereo streams. Capture and Studio One Artist are both included, providing you with everything you need to begin recording your services and getting your message to the world.
Good news: Because of their flexibility and advanced features, StudioLive AR-series mixers will grow with your church’s needs. When your community needs larger-format digital mixers with more processing and recall, your StudioLive AR-series mixer will find a home in a youth room, overflow venue, or at the church picnic.
 For smaller houses of worship or youth rooms that require digital mixing power with the simplicity of an analog design, PreSonus also offers the StudioLive 16.0.2USB. This compact digital mixer provides a familiar, easy-to-use interface that keeps all critical controls visible and accessible. But don’t let the analog feel fool you: The StudioLive 16.0.2 USB offers the power of modern digital mixing, multitrack recording, wireless remote control, and more. Once connected to a computer using the onboard USB audio interface, the StudioLive 16.0.2USB can also be remote controlled from UC Surface.