


Proper studio monitor placement and calibration is critical to get the best experience in your listening environment. Taking the extra time to set up your studio monitors will make mixing easier and ensure that your mixes translate well from speaker to speaker. Like everything in recording and mixing audio, careful preparation will give you a better result. Luckily, perfecting your mixing environment only takes a little know-how, planning, and time. PreSonus has put together this brief guide to provide you with the information necessary to get the most out of your monitoring system.
A companion guide for Studio Monitor Placement is available here. It is highly recommended that you review the physical orientation of your studio monitors and your mix position prior to calibrating your studio.
Calibrating Full-Range Monitors
After you have properly positioned your studio monitors and listening position, it is helpful to set all the levels in your studio so that you are optimizing every component. While not essential, taking the time to properly calibrate your speakers can be very valuable in this respect and will also give you a great starting point to troubleshoot or fine-tune your mixing environment.
The main purpose of speaker calibration is to ensure that a specific metered audio level in your DAW or on your mixer equals a predetermined SPL in your studio environment. Depending upon the method and reference levels used during calibration, proper calibration can help reduce unwanted noise, minimize the risk of damage to your studio monitors and to your ears, maximize the reference capabilities of different speaker types, and ensure you hear the audio as accurately as possible.
There are many methods for calibrating studio monitors. Which method is best for your studio depends on the nature of your mix environment, gear, clientele, and audio mixes. If you wish to calibrate your studio monitors using a different method than the one described here, we encourage you to do so. The important thing is not the way you calibrate your environment but that your environment has been calibrated—even if you only use your ears, common sense, and your favorite recording.
Nearly every calibration method has one thing in common: test tones. There are many different types of test tones. The one we’ll discuss here is full-bandwidth pink noise. With full-bandwidth pink noise, every frequency band is present at exactly the same level, so it is ideal for speaker calibration, room analysis, and many other types of acoustic measurements. Full-bandwidth pink noise samples can be purchased from your local electronics or entertainment retailer or downloaded from a variety of free Web sites.
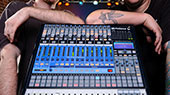
Some DAW applications, including PreSonus Studio One, feature a tone-generator plug-in that offers a wide range of test tones, including pink noise. If you are using a DAW for tracking and mixing, using it as a calibration source is ideal.

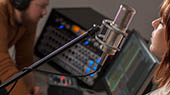
When calibrating reference monitors in a studio, the acoustic level or sound pressure level (SPL) should be measured from the mix position at seated ear height. There are an assortment of great SPL metering apps on the market for smartphones, and many are free! You can also find accurate SPL meters at your favorite local electronics-supply store.
 The SPL meter should be held at arm’s length, with the microphone pointed at the center point between the left and right speakers (where your head will be), angled at 45 degrees to ensure an accurate reading. If your SPL meter is also your cell phone, make sure your finger or cell phone case isn’t covering the mic!
You should calibrate the right and left monitors independently to ensure that both monitors are set to the same acoustic level. This will ensure that your stereo mixes are balanced and will translate well across different speaker systems.
When two or more monitoring systems are calibrated using the same method, each system should generate the same acoustic level when given the same input source. This is especially important when referencing your mix on different sets of monitors (such as toggling between Speaker A and Speaker B for comparison). Just like a single system, the left and right monitors of each monitor pair should be calibrated independently to ensure that each speaker is set to the same level.
Level calibration is especially important when you have two or more speaker pairs because there should not be a change in loudness level when switching between the different sets of speaker. In an incorrectly calibrated studio, the acoustic level will jump when toggling between the different systems and lead to a potentially inaccurate perception of the consistency and quality of your mix.
Calibrating Using 85 dB SPL “Standard” Reference
This method relies on technical data rather than on subjective listening and is consequently one of the most common calibration standards. The goal of this calibration method ensures that when the output meters in your DAW or mixer register 0 dB, the SPL in your mix position is 85 dB.
This section will take you through the basics of “Standard” Reference calibration. To calibrate your speakers, you will need an SPL meter and some pink noise. If your monitor system also includes a subwoofer, you will find continued calibration instructions the section “Calibrating Subwoofer Level.”
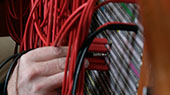
- Connect the main outputs of your audio source to your studio monitors. The left output should be connected to the speaker on your left. The right output should be connected to the speaker on your right.
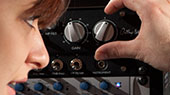
- Begin by turning the input sensitivity of your studio monitors to the lowest setting.

- Turn the output of your audio source (audio interface, mixer, or speaker-management device) to its lowest setting.

Note: If you have any outboard processors (EQs, limiter, etc.) connected between the audio source and your monitors, disconnect or bypass them. If your audio source is a mixer, make sure that it is zeroed out.
- Play 20 Hz to 20 kHz full-bandwidth pink noise at 0 dB through the outputs of your primary audio source.
- Turn up the outputs of your primary audio source to their unity gain setting. “unity gain” is the setting at which the signal level is neither boosted nor attenuated. It is usually marked by a “0” or a “U” on the audio device’s level fader or knob. In many digital interfaces and digital devices, the device’s maximum level is also its unity gain setting. Please consult your audio device’s user’s manual or the manufacturer’s Web site for more information on its levels and adjustments. You should not hear the pink noise. If you do, repeat step 2.

- Begin slowly increasing the input sensitivity (volume) of your left speaker until the acoustic level of the test tone playing reaches 82 dB SPL. When both speakers play simultaneously, the overall SPL will increase by about +3 dB (85 dB).

- Power down your left speaker.
- Slowly increase the input sensitivity (volume) of your right speaker until the acoustic level of the test tone playing reaches 82 dB SPL.
- Stop the pink noise and turn your left speaker back on. Play some program music you are familiar with through your speakers and sit down in your mix position. You may need to fine-tune your speaker placement until the sound is balanced and you have a nice, wide sweet spot from which to mix.
Note: If 85 dB is too loud for your room, either because of noise constraints or because the room is too small, you can redo the above calibration steps and dial in each speaker to 79 dB instead. The important thing is that both speakers are set to the same SPL level, not the level itself.
Calibrating Subwoofer Level
 Just as it is important to make sure your full-range monitors are calibrated to the same level, you must ensure that your subwoofer is calibrated to match the full-range speakers. There is no need to recalibrate your studio monitors if you followed the 85 dB standard reference described earlier. If you are connecting your full-range system to the outputs of your sub, rather than to the outputs of your audio source, you should recalibrate your full monitor system.
- Turn your subwoofer input level to its lowest setting and power down your full range monitors.
- Play 20 Hz to 20 kHz, full-bandwidth pink noise at 0 dB through the outputs of your primary audio source.
- Turn up the outputs of your primary audio source to their Unity Gain setting.
- Begin slowly increasing the input sensitivity of your subwoofer until the acoustic level of the test tone reaches 79 dB SPL. Again, take your SPL measurement holding your meter at arm’s length at a 45-degree downward angle, where your head will be.

- If your subwoofer has a variable lowpass filter, set the filter to its highest frequency. This will create an overlap between your subwoofer’s and your full-range system’s frequency responses.
- Turn your full-range monitors back on, play program music with a lot of bass in it through your new 2.1 system, and experiment with the polarity switch on your subwoofer to see which position provides the best bass response at your mix position. Leave the polarity switch in the position that provided the loudest bass response. This means that your subwoofer is in phase with your full-range system.
Note: If you set each full-range model to a lower level than 82 dB, you will want to do the same with your subwoofer. For example, if you set each full-range monitor to 79 dB, reduce your subwoofer by -3 dB as well (to 76 dB).
Setting the Crossover Transition
Many full-range monitors (like the Eris, R-series, Sceptre lines) provide a highpass filter for bass management. These highpass filters are usually not fully variable but often a few different frequency-cutoff options will be available. Some subwoofers (like the Temblor T8 and T10) also provide a highpass filter on the outputs for this purpose.
Depending on the system, leaving frequency content below 60 to 120 Hz in your full-range monitors can introduce destructive cancellation and reinforcement with the highest frequencies that are reproduced by your subwoofer. Using a highpass filter on your full-range monitors will remove these frequencies and help you to create a more seamless crossover transition with your subwoofer.
If your subwoofer, like the Temblor series, provides a variable lowpass filter, your job is made a little easier in that you have more control over the crossover point.
The first rule of thumb when dialing in the crossover transition in your 2.1 system is to listen. Depending on the frequency range of your full-range monitors and your subwoofer, you may not have to do much. For example, if the lowest frequency your full-range monitors can reliably reproduce is between 70 and 80 Hz, you may not have to do anything but plug in your subwoofer. If, however, your full-range monitors are accurate below 60 Hz, you will most likely need to use the following instructions to configure your crossover network.
If your subwoofer provides a variable lowpass filter:
- Set the highpass filter for your full-range monitors using either their onboard controls or the highpass filter on your subwoofer.
- Set the lowpass filter on your subwoofer to the same frequency. For example, if you are engaging an 80 Hz highpass filter on your full range monitors, set the variable lowpass filter on your subwoofer to 80 Hz.
 From this point you can experiment with the lowpass filter setting that provides the smoothest crossover transition while listening to your favorite music. Again, your subwoofer should naturally extend the low-frequency response of your monitor system. You should not hear any frequency boosts or cuts.
Once your system is properly calibrated, listen to a wide variety of your favorite music and mixes and make any final adjustments. At the end of the day, your ears are the best tools you have in the studio.